Simple Android Application for Native Calculator
Aim:
To develop a Simple Android Application for Native Calculator.
Procedure:
Creating a New project:
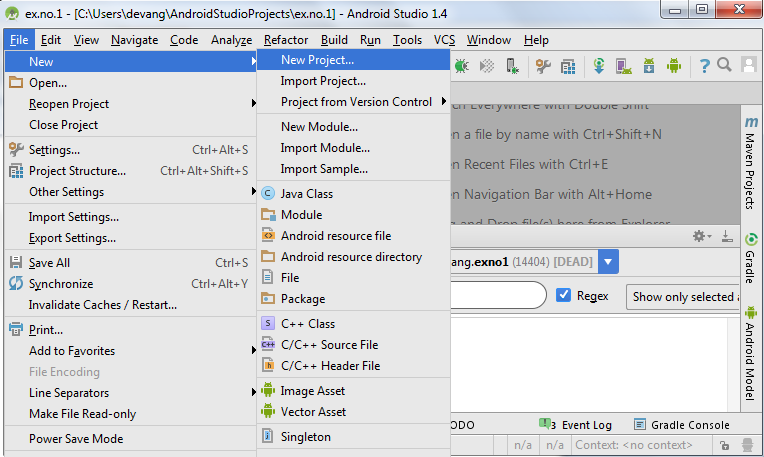
- Open Android Stdio and then click on File -> New -> New project.
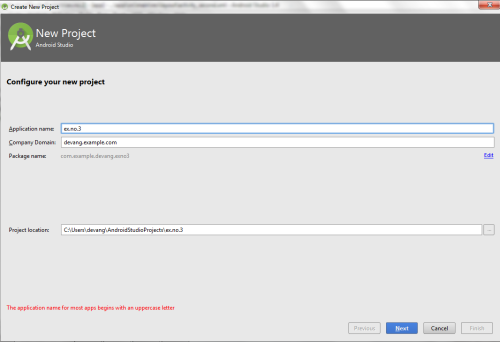
- Then type the Application name as “ex.no.3″ and click Next.
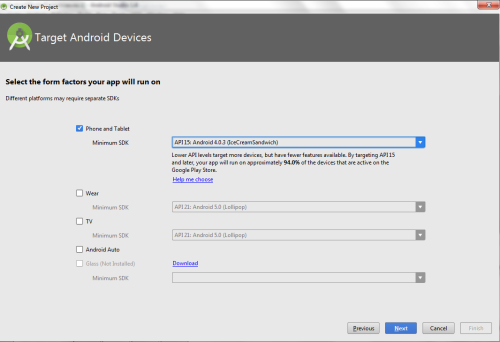
- Then select the Minimum SDK as shown below and click Next.
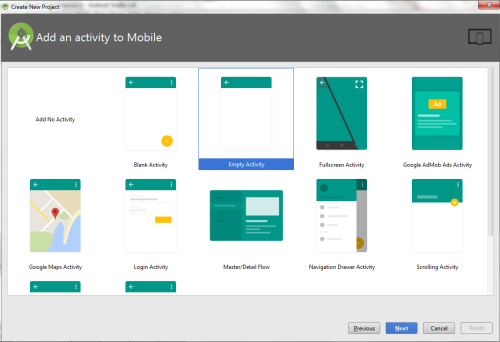
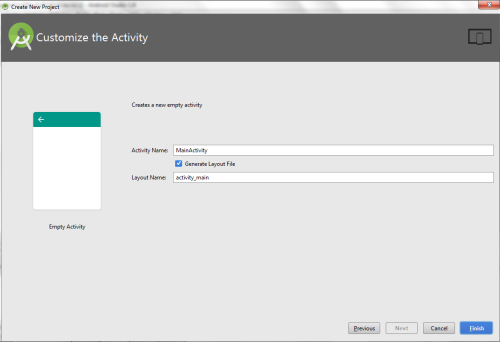
- Then select the Empty Activity and click Next.
- Finally click Finish.
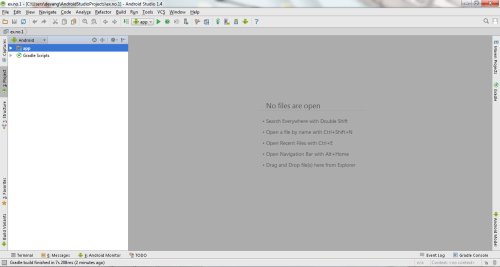
- It will take some time to build and load the project.
- After completion it will look as given below.
Designing layout for the Android Application:
- Click on app -> res -> layout -> activity_main.xml.
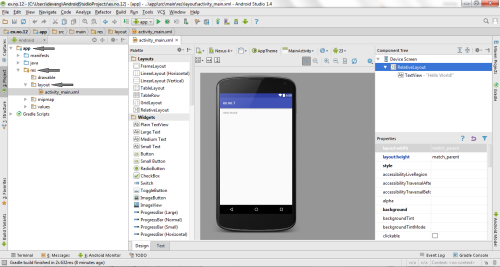
- Now click on Text as shown below.
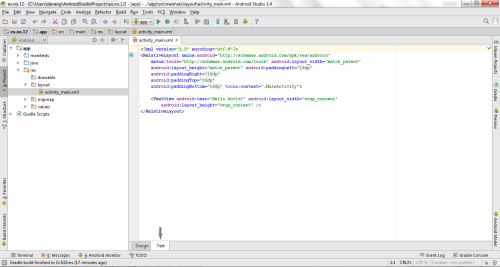
- Then delete the code which is there and type the code as given below.
Code for Activity_main.xml:
<?xml version="1.0" encoding="utf-8"?>
<LinearLayout
    xmlns:android="http://schemas.android.com/apk/res/android"
    android:orientation="vertical"
    android:layout_width="match_parent"
    android:layout_height="match_parent"
    android:layout_margin="20dp">

    <LinearLayout
        android:id="@+id/linearLayout1"
        android:layout_width="match_parent"
        android:layout_height="wrap_content"
        android:layout_margin="20dp">

        <EditText
            android:id="@+id/editText1"
            android:layout_width="match_parent"
            android:layout_height="wrap_content"
            android:layout_weight="1"
            android:inputType="numberDecimal"
            android:textSize="20sp" />

        <EditText
            android:id="@+id/editText2"
            android:layout_width="match_parent"
            android:layout_height="wrap_content"
            android:layout_weight="1"
            android:inputType="numberDecimal"
            android:textSize="20sp" />

    </LinearLayout>

    <LinearLayout
        android:id="@+id/linearLayout2"
        android:layout_width="match_parent"
        android:layout_height="wrap_content"
        android:layout_margin="20dp">

        <Button
            android:id="@+id/Add"
            android:layout_width="match_parent"
            android:layout_height="wrap_content"
            android:layout_weight="1"
            android:text="+"
            android:textSize="30sp"/>

        <Button
            android:id="@+id/Sub"
            android:layout_width="match_parent"
            android:layout_height="wrap_content"
            android:layout_weight="1"
            android:text="-"
            android:textSize="30sp"/>

        <Button
            android:id="@+id/Mul"
            android:layout_width="match_parent"
            android:layout_height="wrap_content"
            android:layout_weight="1"
            android:text="*"
            android:textSize="30sp"/>

        <Button
            android:id="@+id/Div"
            android:layout_width="match_parent"
            android:layout_height="wrap_content"
            android:layout_weight="1"
            android:text="/"
            android:textSize="30sp"/>

    </LinearLayout>

    <TextView
        android:id="@+id/textView"
        android:layout_width="match_parent"
        android:layout_height="wrap_content"
        android:layout_marginTop="50dp"
        android:text="Answer is"
        android:textSize="30sp"
        android:gravity="center"/>

</LinearLayout>
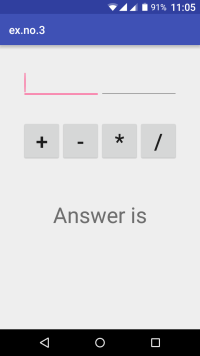
- Now click on Design and your application will look as given below.

- So now the designing part is completed.
Java Coding for the Android Application:
- Click on app -> java -> com.example.exno3 -> MainActivity.

- Then delete the code which is there and type the code as given below.
Code for MainActivity.java:
package com.example.devang.exno3;

import android.os.Bundle;
import android.support.v7.app.AppCompatActivity;
import android.text.TextUtils;
import android.view.View;
import android.view.View.OnClickListener;
import android.widget.Button;
import android.widget.EditText;
import android.widget.TextView;

public class MainActivity extends AppCompatActivity implements OnClickListener
{
    //Defining the Views
    EditText Num1;
    EditText Num2;
    Button Add;
    Button Sub;
    Button Mul;
    Button Div;
    TextView Result;

    @Override
    public void onCreate(Bundle savedInstanceState)
    {
        super.onCreate(savedInstanceState);
        setContentView(R.layout.activity_main);

        //Referring the Views
        Num1 = (EditText) findViewById(R.id.editText1);
        Num2 = (EditText) findViewById(R.id.editText2);
        Add = (Button) findViewById(R.id.Add);
        Sub = (Button) findViewById(R.id.Sub);
        Mul = (Button) findViewById(R.id.Mul);
        Div = (Button) findViewById(R.id.Div);
        Result = (TextView) findViewById(R.id.textView);

        // set a listener
        Add.setOnClickListener(this);
        Sub.setOnClickListener(this);
        Mul.setOnClickListener(this);
        Div.setOnClickListener(this);
    }

    @Override
    public void onClick (View v)
    {

        float num1 = 0;
        float num2 = 0;
        float result = 0;
        String oper = "";

        // check if the fields are empty
        if (TextUtils.isEmpty(Num1.getText().toString()) || TextUtils.isEmpty(Num2.getText().toString()))
                return;

        // read EditText and fill variables with numbers
        num1 = Float.parseFloat(Num1.getText().toString());
        num2 = Float.parseFloat(Num2.getText().toString());

        // defines the button that has been clicked and performs the corresponding operation
        // write operation into oper, we will use it later for output
        switch (v.getId())
        {
            case R.id.Add:
                oper = "+";
                result = num1 + num2;
                break;
            case R.id.Sub:
                oper = "-";
                result = num1 - num2;
                break;
            case R.id.Mul:
                oper = "*";
                result = num1 * num2;
                break;
            case R.id.Div:
                oper = "/";
                result = num1 / num2;
                break;
            default:
                break;
        }
        // form the output line
        Result.setText(num1 + " " + oper + " " + num2 + " = " + result);
    }
}
- So now the Coding part is also completed.
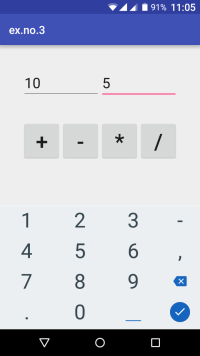
- Now run the application to see the output.
Output:
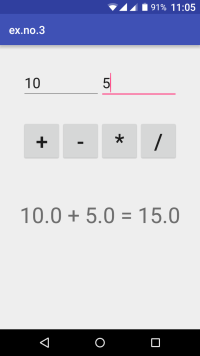

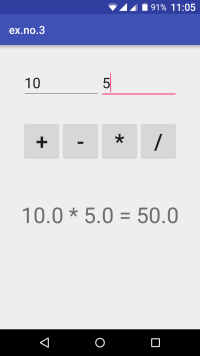
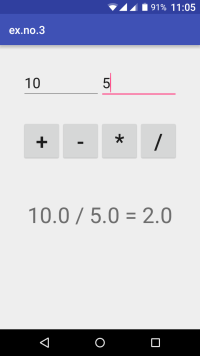
Result:
Thus a Simple Android Application for Native Calculator is developed and executed successfully.


great work !!
Thanks jabin.. 🙂
great work.but i need to learn how can i learn or to understand it
very nice….
superb
nice and it help me to learn quickly…..
wow bro u r genius
Great work